Background

Monday 25 October 2010

More bootie from the Booty..

Well I've managed to get myself a couple of fabby items. the first from the Ebay shop opposite our's at Blackminster called Wizpan. Mary has some lovely bits and pieces, a proper bric a brac shop with some really nice bits.

This lovely little woven sewing basket is in fabby condition and I'm going to be carefull to make it over without altering it. I think it will need just a good clean and maybe some new fabric for the lining, other than that I think I got a nice little bargain. Cant decide what it will hold yet possibly it will return to being a sewing basket as recently I can see it's been used for holding plants so we'll see.

Next is a 50p bargain from the weekly boot sale up the road from us. Its a simple wire basket, about 12" x 9" so will come in handy for my paint pots or inks and sprays. Going to give this a good clean and then respray it with a smooth hammerite to make sure it takes the knocks and bumps that things seem to suffer from in my craft space, maybe I should stop the grandchildren from using it but what fun would that be.........
I think a bit of alcohol inks on the handle should do the job......
Dont ya just love a bargain, hope to get these done in the next wee while so I'll post piccies of the finished items as and when.

~ ~ ~


Also this week we have been to the Mop Fair in Stratford. I just love the lights, noise and smell of the fair. I also love the taste but with Slimming World not being quite so successfull this week have abstained from hotdogs and candy floss :(

ok so the focus is really bad but I think you can just make out Bev, Dave and yes Abi on the Twister. My but that granddaughter of mine is a daredevil. The faster they go the better she likes it.....

Take care

Julie xx

Friday 8 October 2010

Wild Rose Christmas

Here is one of my first Christmas cards, made using the Wild Rose stamp "Christmas Friends" from Bee Crafty. Coloured using water colour pencils and layering on various colours of card. Die cut mats from the Nestabilities range of dies.

Sneaks back in....

Yup, thats me. Sneaking back in, mind you probably wasnt missed. I think everyone is used to me going AWOL.

Well we've just got home from a fabby week away in France, yes usual place - La Croix du Vieux Pont. A beautiful oasis about an hour to the east of Paris that has everything you could possibly need for a fabby craftaway holiday. This time we took our wonderful grandson Alex with us for the first time and boy oh boy did he enjoy it. We swam, walked and cycled everyday and usually more than once of each which beggars the point - Why does my weight not come off quicker?? arhh well Slimming World is my friend so see you all Tuesday :) .

Again on this trip I managed to make a few cards and other projects with the help of Alex so will get them uploaded shortly.

Have a look at the new Bee Crafty Challenge Blog too, some fabby prizes as well as great inspiration from other crafters. This is a brand new challenge blog so please pop along and add your entry...

Well it's off for a haircut and coffee with Beck's so I'll pop back in a while with those card pictures aswell as a few more holiday ones..

Bye for now

Julie-Ann xx

Thursday 22 April 2010

"Two Ewe"

Well, what a beautiful afternoon. Hope you are all enjoying this glorious weather. I know I am even though I'm stuck indoors it's lovely to look out and see the sun, even if it does show up the fact I really ought to go and clean the windows....

So to today's offering and it's the turn of Wild Rose stamp "Two Ewe". Coloured using Derwent Coloursoft pencils and blended with Sansodor. the nice thing with sheep is a bit of grey pencil just around the edges, a quick blend out and theyre done.


The green background paper is Basic Grey Oh Baby Ivy and the red one is Fancy Pants Wildheart Wild Iris. The border strip is an off cut from making the card blank of green stamped with several small flower stamps all over to create a contrasting pattern. Then the image layer was inked around the edges with Tim Holtz Distress Ink Shabby Shutters and the punched out quote inked with Distress Ink Worn Lipstick. Finally finishing off with some paper roses and Bee Crafty Blooms.

Thanks for looking.

Julie-Ann
xxx

p.s. Dont forget to pop over to Sams blog and check out her projects. I think she is currently on 1-a-day

Papertake - Sketch
Crafty Catz - Red + Green + use a punch
My Time To Craft - Quick Quote
Polka Doodles - Animal Magic

Wednesday 21 April 2010

Special Day......

I've been having another go with my ProMarkers and I'm not to unhappy with this one.


The stamp used is Wild Rose "Special Day"

I've just used Red for the dress, going over the edges a couple of times to get some shading and Black and Ice Grey 5 for the bag and hair. The base card is white with Kanban Rouge Flabellum layered on top. This has that lovely black and red satin effect border which I have just added a strip of red satin ribbon to. Next layer is a piece of white that I've put through the Big Shot inside a Sizzix embossing folder called Dots and Diamonds Large from the Hello Kitty range. Then comes a strip of red satin card with a layer of white that I've stamped a floral design onto. The stamped image was layered onto red card and stuck into position.
Finally some faux stitching and acouple of strategically placed Jewelled brads and Bee Crafty Blossoms and the card is finished.

Sweet Stampin - Stitches
Allsorts - Stitches
Cup Cake Craft Challenge - Red and White
Stamp Something - Layers
I Love Promarkers - Black, White + 1other colour (Red)

Friday 16 April 2010

Fairy Wings .....

Here we go, I appear to be on a roll as here is another card made using Bo Bunny papers.


The one's used on this card are "Sophie Bouquet" and "Sophie Silhouette". Matted and layered onto pale blue and buff cardstock. Again I have used Bee Crafty Blossoms and some lace and satin ribbons.
The punch is Martha Stewart "Daisy Dot".


The fairy is coloured with Coloursoft pencils and Sakura Stardust "Clear" for that little bit of twinkle.

Thanks for looking.

Julie-Ann xxx

Mojo Monday Week 134 = Sketch
Sweet Stampin  = Colour Combo
Stamp Something = Layers
Flutter By Wednesday = Use a fairy, butterfly or angel
Tuesday Morning Sketches = Soft hues, flower, ribbon

Dont forget to pop over and say "hi" to Sammy on the Bee Crafty Blog. She has been creating like a mad thing and with some really odd material.

Bloomin' Cat....

Hello again,

Well I've been playing again and have come up with this lovely card using anothe one of the Wild Rose stamps "Cat in a Tree".


Again I've coloured using my Coloursoft pencils. Used Nestabilities to cut out the two matted layers. The papers are Bo Bunny "Sophie", "Sophie Dot" and "Bouquet".
The blooms are from Bee Crafty and are centered with Card Candy dots. The little charm is one of the Card Charms range of embellishments, fixed with a jump ring and a small organza bow.

Hope you like it....

Have a good weekend

Julie-Ann xxx

Stampin' For The Weekend

Wednesday 14 April 2010

He Was a Skaterboy......

So here is the second of today's creations. Blimey that sound's arty....hahaha
Anyway here he is, JN Skateboard Boy. Coloured with Coloursoft pencils and blended with Sansodor using paper stumps. I'm really loving these pencils at the moment and am looking to expand my collection, I do hope DH doesn't read this...


For this one I've used a cream scalloped edge 6" x 6" card. Added a layer of Bo Bunny Sophie Dot (the reverse side)slightly smaller than the card and sanded the edges first. Then I've cut three panels of the same paper and sanded the edges (using these on the front side) matted them onto cream card stock leaving a 2mm border all of the way round. Take one of the panels and wrap a piece of burgundy ribbon around top to bottom and tie a knot. Stick these at different levels across the front of the card and using 3D foam adhere the stamped image on the center panel. I then added a cluster of Bee Crafty Blooms to one corner and three Card Candy dots along the bottom edge opposite.


Thanks for looking.....

Julie-Ann xxx

Friday Sketchers
Stamptacular Sunday Challenge
Cupcake Craft Challenge

Puppy Love.......

This is the first of today's offerings. I managed to skive a bit of time at work today and had a fabby time creating what I think are a couple of lovely cards.

This is made using one of my bargain stamps from a swap-shop we had at work, it's Daisy from DO. I've coloured her with my Brushables pens that I used with the watercolour technique by scribbling them onto an acrylic block and then picking up the colour with a waterbrush to apply to the stamped image.


Using Nestabilies labels die I then cut the image out and inked the edges. With the next size up die I cut a layer out of chocolate brown cardstock then stuck them both together.
Taking a 6" x 6" cream blank card I added a layer of Bo Bunny Sophie Bouquet just slightly smaller than the card. Then cut a 3" x 4.5" piece of Bo Bunny Sophie's Notebook and placed it with the backside showing just in from the left side. then cut another rectangle 2" x 5" from the same and place it over the last piece. now punch a border from the green card (I used a Woodware punch) to go width ways across the card just below the center line and wrap with a length of pink grosgrain ribbon. Fix the layered image in position and add a sentiment. Just to the bottom corner I've added three of my current favourite embellishments, Card Candy. These little dots of card come in many many colourways of assorted packs and are available from Bee Crafty.

I would like to thank Sam for letting me play away today while she got on doing her job which is creating beautiful projects for Bee Crafty. Her latest being an altered jigsaw which is available to see here on the blog.

Please pop over and see what she has been up too.

Thanks for dropping by....

Julie-Ann xxx

A Spoon Full of Sugar
Pollycraft Monday Challenge
Pink Elephant

Tuesday 13 April 2010

Easel Card.......

Good morning,

Blimey that weather out there is decieving. Only put a light top on and it's flaming freezing. How does that work then, bright sunshine, blue skies, bit of a breeze and it's icy cold.......bonkers!!!!

Anyway today I've done an easel card using Coredinations cardstock for the base card and all of the layers.


I've coloured the image (ARS Country Girl) with Coloursoft pencils and layered using Nestabilities dies.
The flower embellishments are Bee Crafty Blooms attached with brads . The "Thanks" and the ribbon slide are Cuttlebug die's and the "Sweet Pea" is a Cuttlebug embossing folder.


A couple of lengths of ginham and mini flower ribbon, along with a few pearl stems finish it off.

Hope you like it.....

Julie-Ann xxx

Sketch Saturday
Moving Along With The Times
Allsorts Challenge Blog
My Time To Craft
Papertake


Friday 9 April 2010

Louis in the Rain

Here he is, Louis in the Rain. Coloured with my fabby new Derwent Coloursoft pencils. They are lovely to work with and I have blended them with Sansodor spirit for that seamless colour.

Photobucket

The papers used are from the TPC Celebration range (Bee Crafty), the plain colour's being the reverse of the patterns. Woodware border punch - wave. Length of wide blue ricrac ribbon and some Bee Crafty Blooms mounted on a die cut layer scalloped circle Nestabilities all held together with a large spotty brad from Dovecraft. Attach 3 comlimentary buttons to the left hand side and thats it.

Stampavie and More Challenge 89
Sophisticat Challenge Blog

Hope you like it...

and thanks for looking

Julie-Ann xx

p.s. tomorrow I'm off to a Derwent demonstration so hopefully when I come back I will have picked up a few tips to improve my technique.

Flower Soft Card.....

Hello again,

Today I'm showing you my Flower Soft card. I feel even I can say this is beautiful.
Photobucket

Created by folding an A4 sheet of pink card stock in half and adding a layer of pink patterned paper (Kelly Panacci Maroon Daisies)then added a layer of cream that I embossed with my Cuttlebug Swiss Dots embossing folder (my favourite still) and inked the edges with a random pink ink pad in my box, then wrapped a strip of pink grossgrain ribbon that I threaded a lovely diamonte buckle (Bee Crafty) onto. This is topped with the Flower Soft image layer of a little girl holding flowers that I have added the Flower Soft medium to.
Photobucket

I used 3 colours, Poppy Red, Vintage Christmas and Citrus Crush from the new Ultra Fine range (Bee Crafty) also adding some to the grass level. Inked the eges of this layer before sticking it down with 3D foam pads for dimension. Finally adding 3 buttons sitting on upturned Card Candy dots and some Bee Crafty Blooms with a paper rose.

Cute Card Thursday Challenge


Thank you so much for looking at my blog...

Julie-Ann xx

Wednesday 7 April 2010

Pink and Brown .......

Two of my favourite colours, so when a challenge came up from Moving Along With The Times to use them it wasn't to difficult. The sketch was good and with the opportunity to put your own slant on it I did just that.

Photobucket

I've cut and folded a 6 x 6 from brown card stock then punched the edges with EK Success border punch Scalloped Diamond (Bee Crafty). Added a piece of pink card that I embossed with the Cuttlebug Swiss Dots embossing folder. Using the offcuts of both I made a small matted layer to go across the bottom finishing it off with a narrow strip of two tone brown ribbon. Taking a die cut "S" and covering it with a piece odd patterned paper from the scraps drawer, sanded and inked the edges with Distress Ink then added a couple of stamped images. Then to complete the sketch a layered square put behind the "S" and a couple or 3 flowers added to represent the circles on the sketch..............Voila...

Saturday 3 April 2010

ColourSoft Part Deux

Ok so I might just be getting a little obsessive with my new pencils but they say practice makes perfect, so I'm gonna keep on practicing.


I've taken this lovely stamp by Wild Rose Studio called Louis in the Rain from Bee Crafty and stamped him onto some extra smooth card with Memento Ink.


Then taken two different shades of brown and gone around each bear. Also going into some of the areas where shadow is needed.


Now take a paper stump, dip it into Sansodor (a low odour solvent) and use to blend the colour. I used small circular movements gently thinning the colour until it was smooth and seamless


Finally I have taken my chosen colours for the umbrella and done the same as I did to the bears, coloured the edges of each panel then blended with Sansodor. Also added a spot of blue to each of the rain drops and blended down.


Oooops forgot to say that I had used a soft grey to create a path for the bears to be standing on. Cant have floating Bear's now can we........

Thanks for looking

Julie-Ann xx


New Pencils.....

How lucky am I? Very.......

Today we had to go to Warwick as DH had a hospital appointment and while out he said that we would go and get my Easter pressie. He had already asked what I'd like and with no hesitation I replied "pencils, I'd like some pencils"

To explain how I'd got to this, yesterday at work I had the lovely Mandy Fox come in and we talked for ages about my efforts with ProMarkers and how it was taking me a bit of getting used to them. It was so nice of her to give me her time and show me where I'd been going wrong, mainly putting down too much ink. We then got on to the subject of alternative colouring mediums and she told me how much she like's pencils. We did a bit of blog hopping and I saw some fabulous work by her and some other designers that I fell in love with the idea of using pencils. So last night when I got home I checked out a few websites and You Tube on how best to use them. That did it, I needed pencils straight away - poor Bill.......

So after the hospital we trawled a few different art and craft shops finally finding what I needed much nearer to home. PSW in Studley in fact, a fabby art shop with loads of different drawing and painting mediums and on a shelf sitting there waiting for me was a boxed set of Derwent Coloursoft Pencils with storage wrap. Then after a brief search found paper stumps, Sansodor and extra smooth card stock. That was me sorted, we headed home and they were soon out on my desk.

So pencils out, pc on and You Tube there for me to follow........

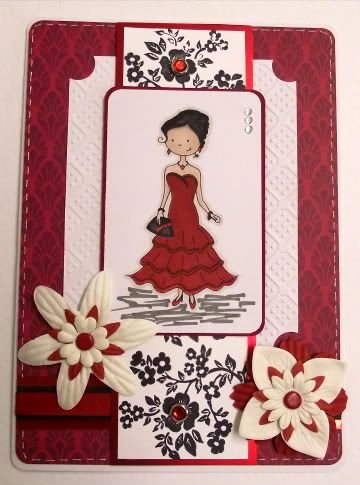
I had a quick sort through my stamp drawer (still not sorted out from the other night) and found this lovely lily stamp. Thought being a couple of colours should be ok and with a bit of luck should be to difficult not to muck it up.

Well I did the leaves first. Just put the colour down around the edges of the leaves and a bit extra where the darker shadows would be, then out with the paper stumps and the Sansodor. A quick dip and rubbed away like a good-un, small circular motion I could remember them saying on the video. Not to bad I thought so moved on to the flowers themselves. Feeling a little cocky I decided to put down two colours, Deep Fushia C140 and Bright Lilac C260. Again, but using a new paper stump, into the Sansodor and with more gentle vigour I blended away with a bit more direction following the curves and folds of each petal and I think it shows. The petals, to me at least, look far more natural than the leaves.


Anyway here is a picture of my first attempt and I would really appreciate your comments as I would really like to get better as I love the effect.......

Happy Crafting

julie-Ann xx

Thursday 1 April 2010

Tidying is not my strongpoint........


I'm a grass widow tonight so after a bit of a bloghop and a chat on Facebook I thought I should start and have a proper tidy up. You know the sort, do out the drawers and cupboards, sort out old magazines and all those bits of card and paper you put in a box saying "that'll come in useful for something" but never actually look in the box when you need a smaller bit. So tonight is it.......
This lovely wire cake stand was a pressie and was supposed to help me keep my tools tidy and to hand, well that worked didn't it. Looks pretty though even when it's untidy so that can wait......


I found a few bit's that can go into a charity box at work or be swapped with one of the crop ladies, but then I thought I should take photographic evidence of how bad it is and blog about it..........


.........so that's as far as I got - Nowhere really, I'm just too easily distracted, I even had a go with some pencils I found in a drawer that I wasn't even sorting at the time. Just had a look in it to see if it actually needed sorted, and yes, it does.....


Now is it really worth tidying the stamp drawer? I'm only going to rifle through it when I'm looking for something to do a corner or verse, a little swirly thing on the side of a box - so no we'll leave that one for now.....


.....and then we come to the fibre drawer. Definitely not to be touched. Well you can see at a glance the colours and you'll only want to cut of a few inches, so you can just pull out the one you want and snip away.....


Phew, I'm exhausted from all this tidying - think it's time for a cuppa, take care see ya soonly..

bye bye

Julie-Ann xx

Friday 26 March 2010

Easter Basket.......

Hi ya again, I know twice in one day...........

Ok as promised the instructions for the lovely little Easter Basket. You will notice I have enhanced the original slightly and I'm loving it.


You are going to need 1 sheet of card, patterned or plain. I have used a sheet of 12 x 12 Bo Bunny Persuasion Dot. You will also need a paper trimmer or knife and ruler, punches or die cutter, adhesive and some embellishments.


Firstly take your sheet of 12 x 12 (if thats what your using) and cut an 8" x 8" square. Keep the other bits they will come in handy when you come to decorate your bag


Take your square and score each side at 2 3/4". At this stage I fold each side as it's easier than after you have cut.


Now make a cut twice on opposite sides to the center fold as per the diagram.


Attach adhesive to the edge ot the middle panels, again as per the diagram.


Now pull together the outside panels and as they meet fold up the center panel and adhere. (Oh please let this be making sense)


By now your basket should be looking like this........


Take the smaller of the off cuts, in this case the 8" x 4" piece and cut in half length ways. With one piece punch the edges with a decorative border punch or even use a trimmer with a fancy blade, hey it's your basket cut how you like. Now adhere together.


(the error in my punching was to show that it can happen and in no-way spoils the effect of the finishes item)


Attach the handle in place, you will find the edges sit nicely on the top of the side panels so just center it there...


Now for the fun bit

DECORATION.....

Firstly I cut a couple of oval matting layers and a scalloped one. Sanded and inked the edges before layering up. The bottom two flat together and the top one on 3D foam.


Then it was out with the blossoms and brads, threw in some ribbon and a lovely sticker also from the Bo Bunny Persuasion range......

et VOILA!!!!!!!!


Hope you find this useful.....

Jules xxx


F-F-F Friday


It's very strange getting up on a Friday morning and not having to dash about like a mad thing getting ready for work. Yep I've got a Friday off yippee!!! so do I do the good housewifely thing and clean, tidy, dust and polish ........ nah that would be a waste of a perfectly good day off. So shall I colour, cut or crop???????? decisions decisions... Actually I think I may just incorporate the two things that need done - TIDYING & CRAFTING - I'm going to tidy my craft room. I say mine it's sort of shared with a couple of toy boxes and mega amounts of Lego, arhh now all becomes clear, it's not my fault the rooms a mess it's those pesky children (am I a mean nanny blaming my gorgeous grandchildren)hahaha. You tell me, look at the mess.......


just look at all the mess that dolls house makes and that little Lego box in the window just has to go........


No seriously, I love it when I'm sitting at my desk and the kids are playing beside me. We often all sit at the desk colouring or cutting, it's just the best thing ever.

I started my day off last night. Dh went out and I thought I'd have a little play so sat and made this lovely little Easter basket.

It was really easy (come on, I managed it)

Tell ya what, I'm going to go and do a little tuturial and some piccies to go with it. I'll post them here (that is if it's any good) a bit later. The one in the picture measures 12cm wide by 15cm high (that to the top of the handle) top of the basket isn13cm and width is 6cm. Now all you crafters that can look at something and just do it will most likely be able to do it from that, me "NO" so for the rest of us pop back soon and it should be done. So kettle on and camera out me thinks, see ya soonly..............

bye bye

Julie xx

Wednesday 24 March 2010

Pants..........

yup, thats me - Pants@blogging ..... actually that would be a really good label (might use it later if no-one else pinches it first - hahaha)

I've been so busy lately but I'm trying to set aside time foe "ME" not sure how it's gonna go, will have to see.

My latest purchase has been some lovely new clear stamps from Wild Rose Studio's. They are beautifully deepand the images are soooooo clear and when coloured in with ProMarkers look terrific

I've noticed I haven't grounded her so will go back and put some colour down on the bottom of the image so as she doent look like she's floating. I've a couple of other's done but I want to let you know what I've used and my pens are in the shop so I'll try and do those later.

Have a good day ....byee

Sunday 14 February 2010

Sleepy Sunday ......


Hello and good morning, told ya I was rubbish at keeping up with my blog.


Anyway, what a manic few weeks. I have been absolutely rubbish at fat club, putting back the weight I'd lost over the last month so I'm really mad with myself - I mean what a waste of time and money. I really dont want to be the fat mom inn the photo's but looks like I'm failing that battle and fast.


Talking about the wedding, plans are really starting to come together. The venue, church and reception are sorted. Last week Bev ordered her dress and it's absolutely gorgeous, bridesmaids dresses are just about done and mens suits booked. Not bad, oh yes the cake and flowers are also sorted so Bev and David have really worked hard.


Alex's swimming lesson's are going really well and he has given Beaver's a try and decided it's not for him. Little Harry is now pulling himself up at every opportunity and walking is just round the corner I think.


Booked my holiday, going back to that lovely camp site in France we were at last year. Loved it soooo much, might even have a go at fishing while there this time...